Radial Blur : Remarkable Effects Generator
Though Adobe Photoshop is basically a picture editing software,but at the same time, it has many options and tools which are very commonly used for drawing as well. Pictures drawn through the tools of Photoshop are very commonly used everywhere including text books, novels and story books etc. Here in this post I’ll try to show how these tools work to generate the outcome nearly compatible to camera capture. For instance the following image.
 |
| Image :Drawn by the use of Adobe Photoshop |
This image has been drawn completely by the use of different tools and options which are given in the different menus of Adobe Photoshop. Let's try to understand the method through which we can draw a smooth colorful and shiny surface of a compact disc.
How to draw a Compact Disc using Photoshop ?
First of all create a new document by getting inside the file menu and clicking the option Newor by hitting CTRL + N. Then, in the dialogue box that is supposed to be appeared when you click the option New or hit CTRL + N, set the width, height, color mode and content for the file: Width= 1000 px, Height =1000 px, Mode = RGB and Content = White.
 |
| New : This dialogue box appears every time you click New or hit CTRL + N |
After required setting click OK. As soon as you will click OK a new blank document will be appeared on the window. The next thing which is to be done right after that is the creation of a new layer. For that purpose, click the small icon that says ‘Create a new layer‘, having been hovered over every time, beneath the layer window.
| Tiny icon : That is used to create a new layer |
As soon as you will click that icon, a new transparent layer will be appeared in the layer window.
 |
| New layer in the layer palette |
Then select the Elliptical Marquee Tool out of the Marquee Tool menu (this menu remain hidden all the time but reveals itself when you click the small bottom-right arrow in the Rectangular Marquee Tool box).
 |
| Elliptical Marquee Tool in the Marquee Tool menu |
After that, select the layer which you have recently made, by clicking on it in the layer palette and draw selection of a circle.
 |
| Selection made by the use of Elliptical Marquee Tool. |
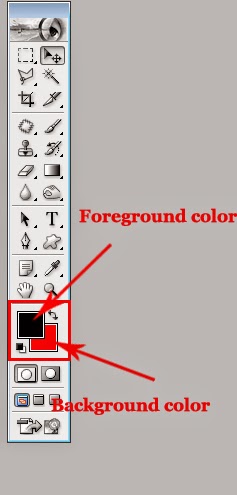
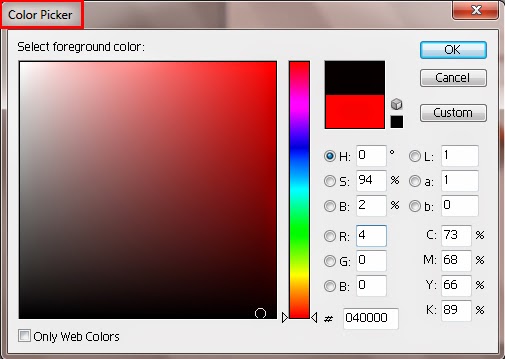
Then using Color Picker, select light grey for the foreground and white for the background color.(If you are a beginner and starting from the scratch and don't know how Color Picker works kindly read my previous post "How to put an image inside the text?".)
 |
| Grey and White : Foreground and Background |
After that, select the Gradient Tool out of the tool window.
 |
| Gradient and Paint Bucket Tool : Both are found in the same menu |
As soon as you will select that tool, the pointer of your mouse will assume the shape of a ‘+’ sign and the tool options will be appeared on the top of the window right beneath the menu bar.
The first option is Gradient Picker. In order to open Gradient Picker, click the small arrow that can be seen at the right side of the box. As soon as you will click that arrow, gradient menu will be appeared.
 |
| Gradient picker : Containing various styles of gradient. |
Out of that menu, select the option Foreground to Background. Then out of the gradient styles, select Linear Gradient, out of the Mode menu select Normal , set the Opacity equals to 100%, while leave the boxes called Reverse, Dither and Transparency unchecked.
 |
| Options of Gradient Tool : Right beneath the menu bar |
After that, put the pointer of your mouse on the circular selection, keep pressed it's left button and drag it. Grey and white gradient will be filled inside the circle.
 |
| Grey and white : Two shades in a singe object |
Then get inside the Select menu and select the option Modify. As soon as your will select the option called Modify, another small menu will be appeared containing only a few options. Select the top most option out of those that is called Border.
 |
| Border :The top most option in the Modify menu |
As soon as you will select that option, a tiny window will be appeared called Border Selection.
In that window set the width equals to 20 PX and click OK. As soon as you will click OK, that window will be disappeared and you will see a 20 PX wide selection of a border around the circle.
 |
| 20 PX wide selection around the circle |
After that, once again using Color Picker, set light pink as the background and light green the foreground color.
 |
| Colors to be filled inside the circle's border |
And then, once again select the Gradient Tool and set the tool options. Out of the Gradient Picker, select the option Foreground to Background, out of the gradient styles , select Linear Gradient, out of the Mode menu, select Normal and set the Opacity once again equals to 100%. Then put the pointer of your mouse on the circular selection, keep the left button of it pressed and drag it. With that drag, gradient color will be filled inside the 20 PX wide border of the circle.After that hit CTRL +D to remove the selection.
 |
| Circle's border after the removal of selection |
Then add another layer by hitting Create a new layer icon and out of the Shape Tools , select
Ellipse Tool.
 |
| Ellipse Tool in the Shape Tool menu |
As soon as you will select that tool, the shape of the pointer of your mouse will be turned into a plus
( + ) sign and the tool options will be appeared at the top of the window beneath the menu bar.
 |
| Options of Ellipse Tool |
Out of those options, select the option Fill Pixels by clicking on it, select Normal out of the Mode menu and select Opacity once again equals to 100%. Then, after making sure that the layer you have recently made is selected; draw a large thin ellipse on the circle.
 |
| Ellipse shape drawn on the circle. |
The next thing you need to do after that is to create a duplicate of the layer on which ellipse shape has been drawn. To create the duplicate of that layer, hit CTRL + J. As soon as you will hit CTRL + J, a duplicate layer will be appeared in the layer palette. All you need to do with that duplicate is to change the color of the ellipse shape on it. In order to change the color of the ellipse shape, you need to lock all the transparent pixels of the layer first. For that purpose, you need to click the small checked transparent layer shaped symbol that can be seen right beneath the Blending Mode menu in the layer window.As soon as you will click that symbol, all transparent pixels of the layer will be locked and a tiny lock shape will be appeared on the layer in the layer palette.
| Small image of a lock on any layer indicates that the transparent pixels of the layer are not subject to any change. |
After that , fill any other light color (light pink) in the ellipse shape of the duplicate layer by selecting the color (background or foreground) by Color Picker and hitting CTRL + backspace ( to fill background color) or ALT + backspace(to fill foreground color). As all the transparent layers have been locked, so when we hit CTRL + backspace or ALT + backspace, color will be filled inside the ellipse shape only and the rest of the pixels on the layer will remain transparent.
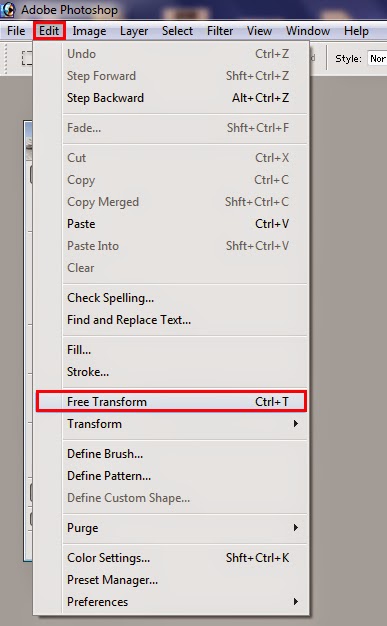
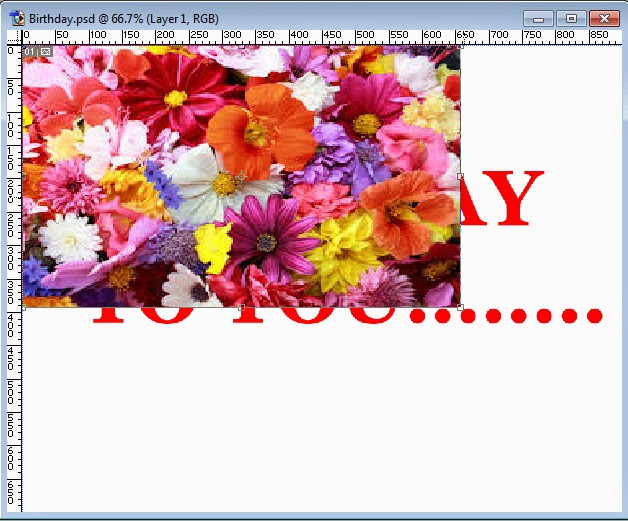
After that, hit CTRL +T to change the angle of the shape on the duplicate layer. As soon as you will hit CTRL +T, Free Transformation Rectangle will be appeared around the shape and the pointer of your mouse will assume the shape of a double sided curved arrow. Then put the pointer of your mouse anywhere near the shape (outside the Transformation Rectangle), keep the left button of your mouse pressed and drag it in any direction to change the angle of the shape on the duplicate layer.
 |
| Image on the duplicate layer after the change of it's angle |
After changing the angle of the shape, press Enter to get out of the state of free transformation. After that, hit CTRL + J once again, to create another duplicate layer, having locked it’s transparent pixels, fill another soft color (e.g. light blue) in it. Then once again hit CTRL + T and change the angle of the shape. After that, repeat the same process from the creation of duplicate to change of the angle, one more time (this time fill light yellow color in the shape.).
 |
| Shapes on four different layers. |
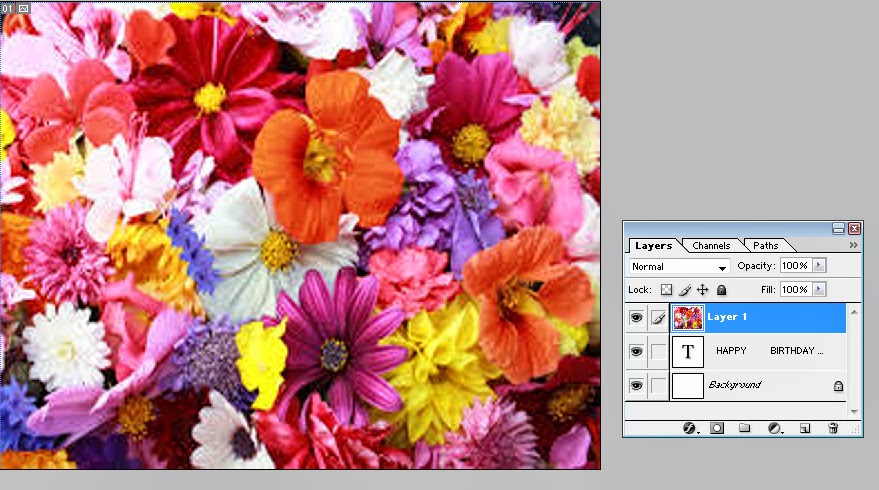
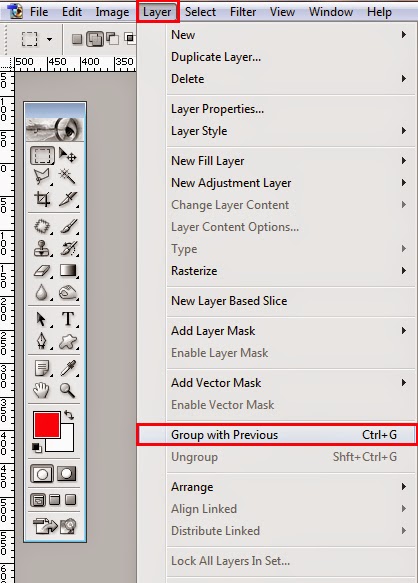
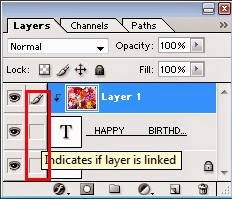
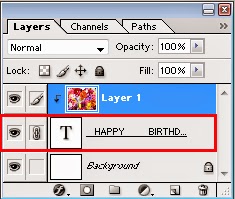
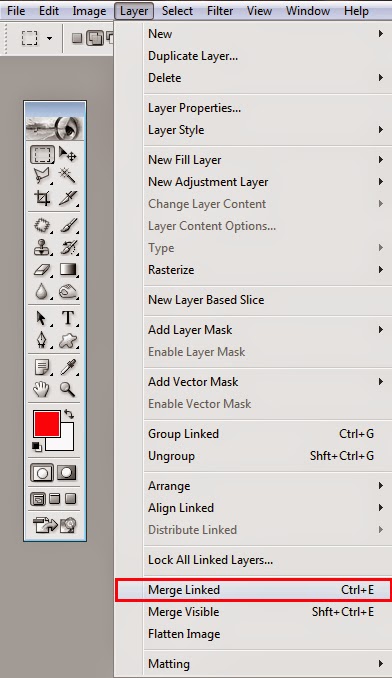
The next thing which is supposed to be done after that is to create links among all the duplicates and to merge them. In order to do so, click the small empty box that can be seen between the layer and small eye shaped icon in the layer palette. As soon as you will click that empty box beside any duplicate, a small chain or clip like symbol will be appeared in the box that will indicate that the layer is now linked with the selected layer.Click all the boxes one by one beside all the duplicates and hit CTRL + E to merge them.
 |
| Two bottom layers are not linked with the top ones |
As soon as you will hit CTRL + E, all the duplicates will be merged with each other and become one layer. Then get inside the Filter Menu , select the option Blur and out of the side-menu of Blur, select the option Radial Blur.
 |
| Blur :This filter has many amazing options |
As soon as you will select that option a dialogue box will be appeared called Radial Blur. In that dialogue box, set the Amount equals to 100, select Spin out of the two options given under the head of Blur Method , select Good out of the three options which are given under the head of Quality and click OK.
 |
| Radial Blur: Is used to blur and spin selected pixels. |
As soon as you will click OK, the dialogue box will be disappeared and you will see a prominent change in the layer on which radial blur has been applied.
 |
| Prominent effects of Radial Blur on the selected layer |
Then, leaving the white background layer, create a link between the two top layers in the layer palette and merge them by following the same method I have explained earlier . Then select Elliptical Marquee Tool again and draw selection of a circle on the dead center of the circular shape on the layer and hit the key delete. As soon as you will hit that key, the selected circle shaped area will be disappeared and the white background layer will be emerged from there.
 |
| Image: After the deletion of selected circular part. |
After that hit CTRL + D to remove the selection and hit CTRL + J to create a duplicate of the layer. After creating a duplicate, hit CTRL + T to make the shape on the duplicate layer smaller. There is no need to repeat that after hitting CTRL + T, Transformation Square will be appeared around the shape. In order to make the shape smaller, put the pointer of your mouse at any point of the Transformation Square, keep the left button of it pressed and drag it in. The shape on the duplicate layer will start to get smaller with the mouse drag, keep dragging until the shape on the layer gets smaller enough to be put inside the empty circular area of the back layer.
 |
| Shape on duplicate layer smaller enough to be put inside the empty circular area of the back layer. |
Then hit Enter to get out of the state of free transformation and using Move Tool, put the smaller shape inside the empty circular area of the back layer.
 |
| Deleted area of the back layer is no longer empty. |
After that, hit CTRL + U to open a dialogue box called Hue/Saturation.
In that dialogue box set the Saturationequals to + 80 and Lightness equals to - 60 and click OK. With that click you will notice that the color shades of the shape on the selected layer will get darker. Then make a link between both layers again and hit CTRL + E to merge them.
 |
| Image : Almost ready to be saved |
Having merged both the top layers by hitting CTRL + E, add a suitable background for your image and save it in any required format by following the methods I have explained in my earlier posts.
Further, you can create more duplicates of the layer that contain our compact disc image by hitting CTRL + J and re-arrange those layers by using Move Tool to create more images of your choice (e.g. the top most image in this post).
I hope this post will be helpful for most of the learners especially for the beginners, if so, kindly let me aware of that by subscribing you comments.


