As I have explained in my earlier posts that the command referred as Purge given inside the Edit Menu of Photoshop is used to delete corrupt files saved inside the computer’s memory holding the record of different commands applied on the currently opened Photoshop document. We usually ignore this command when Photoshop runs in its normal speed, but whenever during work we suddenly notice that the program has lost its usual speed and started to run sluggishly, we can handle this situation and restore the normal speed of the program within a few seconds using nothing but the command named Purge. Whenever we put the pointer of our mouse on the option named Purge given inside the Edit Menu, there is appeared it's sub menu containing a few options including Undo, Clipboard, Histories and All. In my previous posts Purge (Undo) : Makes Photoshop run Faster & Purge (Clipboard) : Makes Photoshop run Faster I have explained the purposes of the options named Undo and Clipboard given inside the menu of Purge and today I am going to explain the third option that is referred as Histories given inside the same menu.
 |
| In order to restore normal speed of Photoshop you can use the option referred as Histories given inside the menu of Purge |
Significance of Histories in the menu of Purge
By selecting the option named Histories given inside menu of Purge, you can delete the record of all the variations made in the currently created or opened Photoshop document. That record can be seen in the History Palette. In order to understand how to delete the record of all the variations made on the currently opened or created Photoshop document follow the instructions given below:
First of all get inside the Window Menu and put check beside the option named Historiesto have History Palette opened on the main Photoshop window.
 |
| Option referred as Histories given inside the Window Menu |
As soon as you will do so, there will be appeared History Palette usually on the right of the main Photoshop window. As you have neither created nor opened any file so far, History Palette will be perfectly empty at this stage according to the picture below.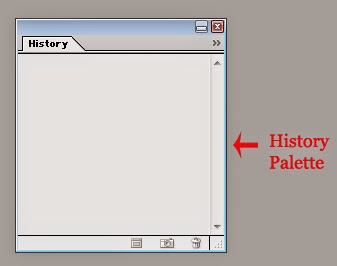 |
| History Palette shows nothing when you have no file opened on Photoshop |
Having opened the History Palette, open an image file on Photoshop either by getting inside the File Menu and selecting the option named Open or by hitting CTRL + O on the keyboard.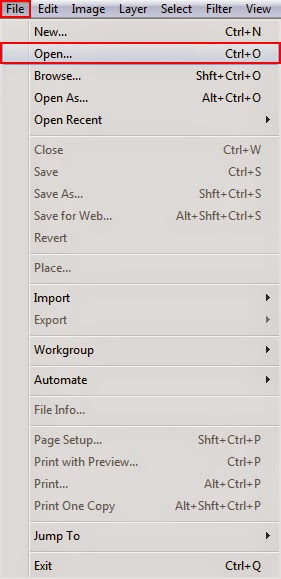 |
| File Menu of Adobe Photoshop containing various options |
As soon as the image will be opened on Photoshop, there will be appeared a thumbnail in the formerly empty History Palette representing the same image and right beneath that thumbnail there will be seen a small symbol showing the step of image opening according to the picture below.
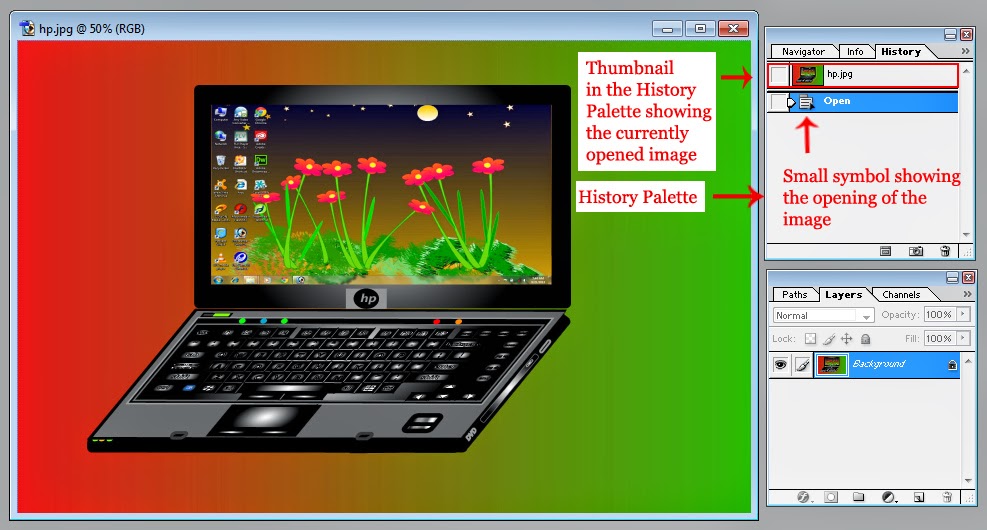 |
| Small symbol in the History Palette showing the record about the opening of the image in Photoshop |
Having opened the image on Photoshop, select the Crop Tool by clicking on it in the tool panel or by hitting C on the keyboard.
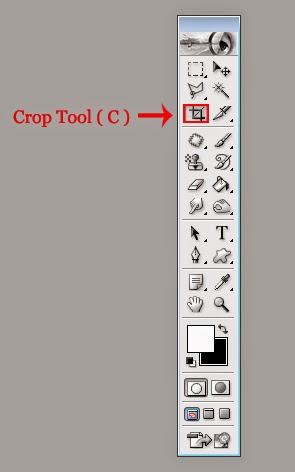 |
| Crop Tool is being selected |
As soon as you will select that tool, pointer of your mouse will assume the shape of the icon that represents Crop Tool in the tool panel and the setting options for the selected tool including Width, Heightand Resolution etc will be appeared in the option bar. Here at this point, you can leisurely ignore these setting options because you can achieve perfect result without even touching them. So leave all the boxes given inside the option bar completely blank according to the picture below. |
| You can leave all the boxes empty in the option bar for the Crop Tool |
After that, put the pointer of your mouse anywhere on the image, keep the left button of it pressed and drag it in any specific direction to select the required part of the image which you want to keep intact in the form of a separate image according to the picture below.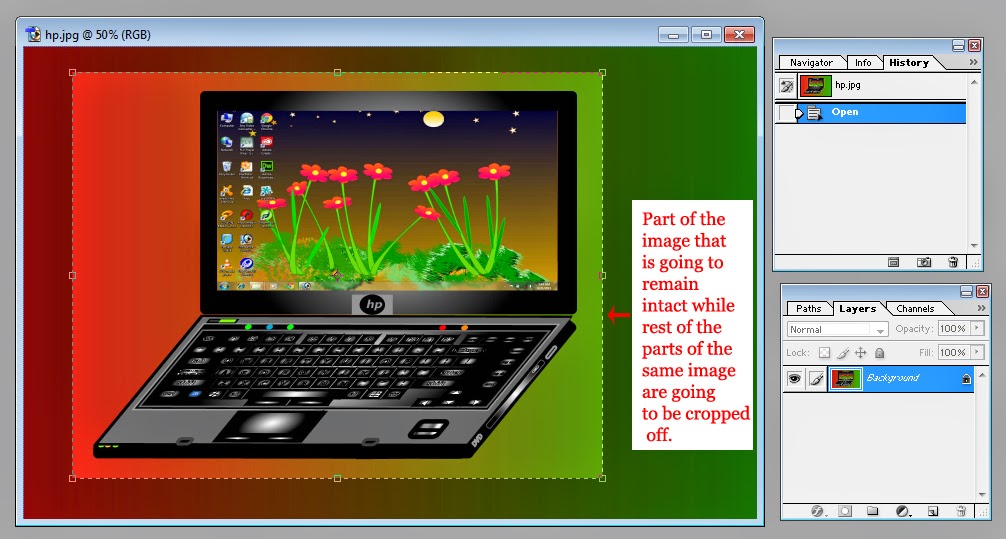 |
| Image ready to be cropped |
Having made the selection of the required part, hit Enter to have undesired (unselected) part of the image cropped off permanently. As soon as you will hit the Enter Key, undesired part of the image will be deleted permanently
and another symbol indicating the step of cropping of the image will be appeared inside the History Palette right beneath the first symbol according to the picture below.
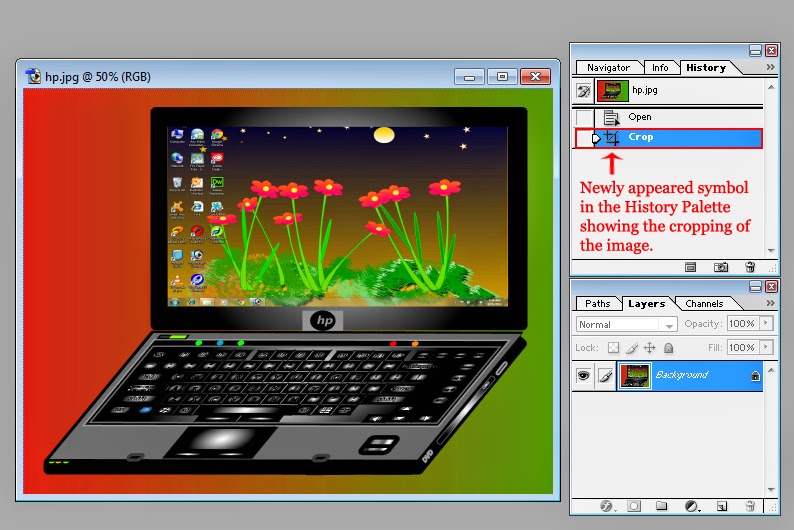 |
| Symbol named Crop has been appeared inside the History Palette |
Then, get inside the Image Menu and select the option referred as Adjustment. As soon as you will select that option, there will be appeared another menu containing various sub options regarding the image adjustment. Out of those options, select non other than Brightness/Contrast by clicking on it.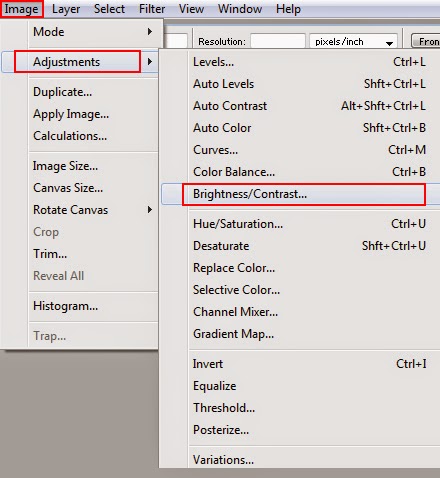 |
| Brightness/Contrast is one of the many sub options of Adjustment |
As soon as you will select that option, there will be appeared a small dialogue box under the head of Brightness/Contrast. In that dialogue box, put check inside the small check box referred as Preview and set the brightness and contrast for the image according to your wish or requirement (e.g. Brightness equal to 0 and Contrast equal to 35) according to the picture below.
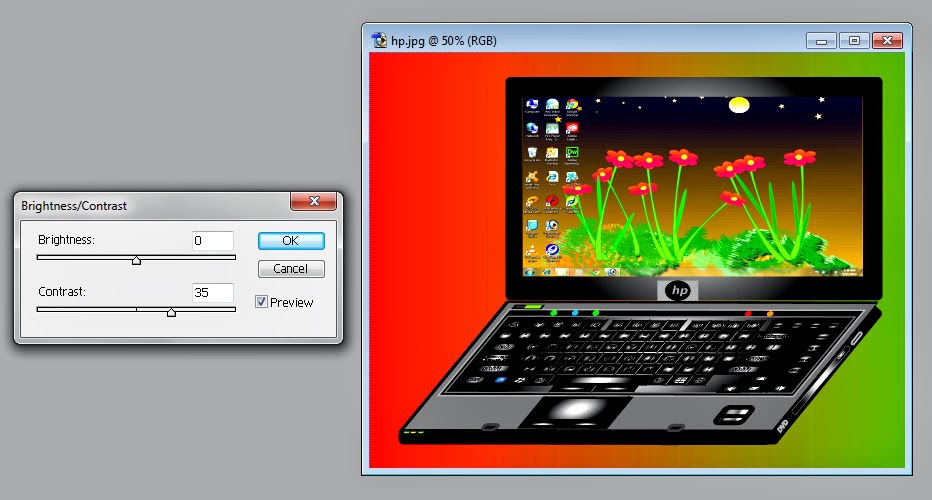 |
| Put check inside the check box named Preview and set Brightness and Contrast for the image |
After that, click the button named OK given in the same dialogue box. As soon as you will hit the button named OK, the recently done setting in the dialogue box named Brightness/Contrast will be applied permanently on the image and in the History Palette there will be appeared another symbol indicating the variation made in the brightness and contrast of the image according to the picture below.
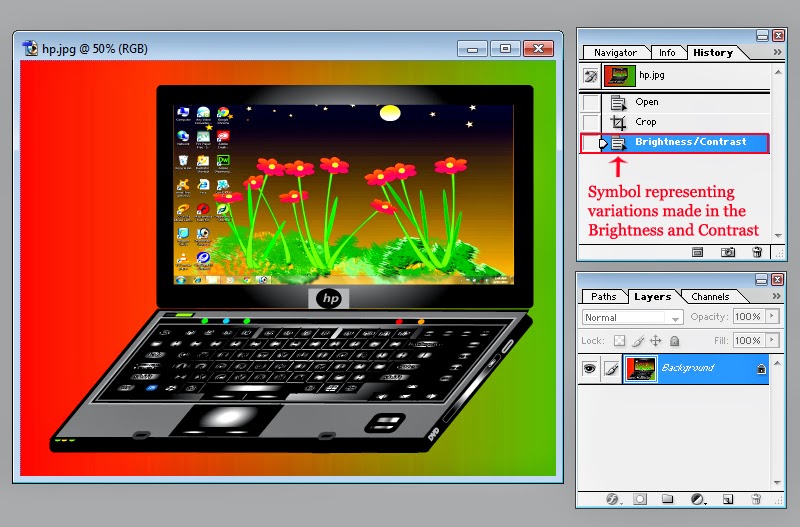 |
| Newly appeared symbol inside the History Palette is indicating the most recent variation made in the image |


Posting Komentar